Tryb jasny i ciemny przy pomocy fotorezystora
Potrzebujemy:
- Arduino UNO
- Płytka stykowa
- 3 przewody połączeniowe
- Rezystor 4,7kΩ
- Fotorezystor 5-10kΩ
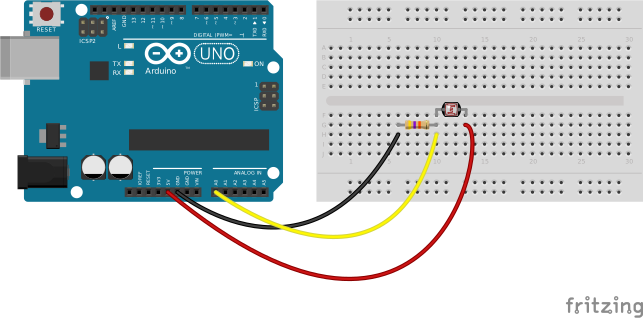
Schemat
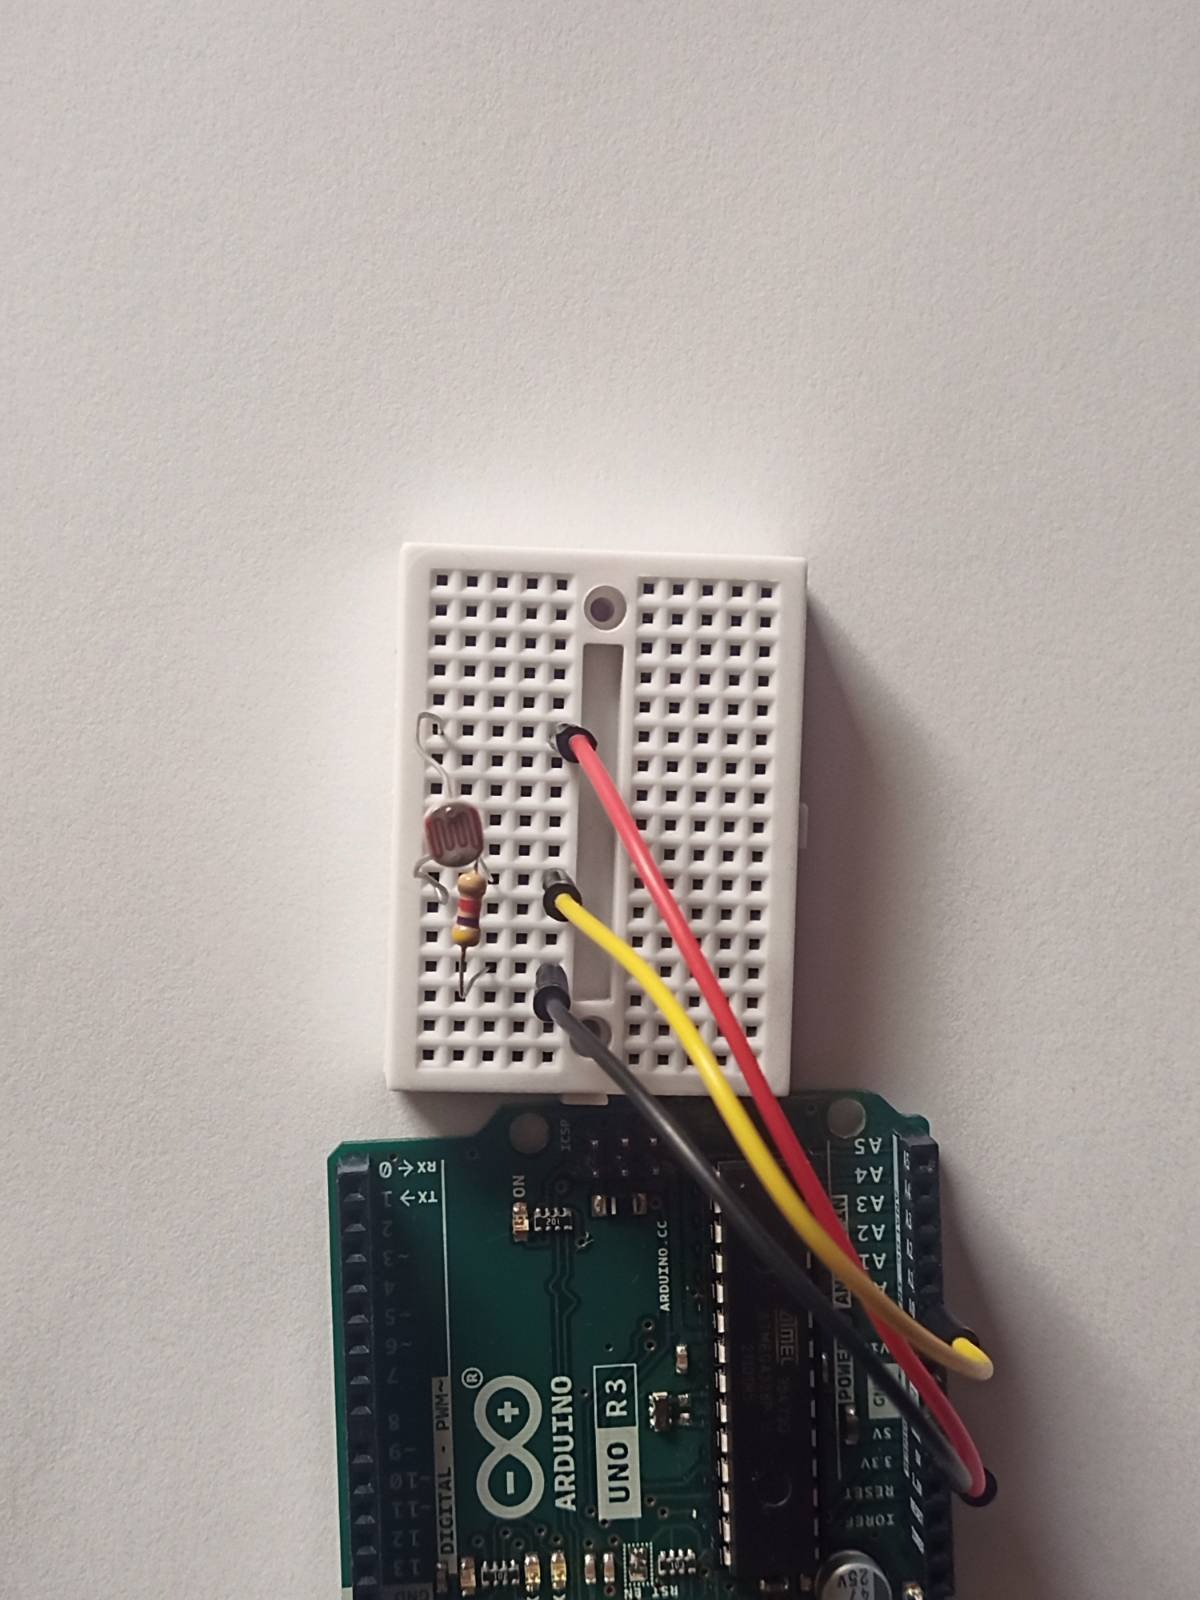
Przykładowe podłączenie
Przykładowy kod
require("dotenv").config();
const http = require("http");
const express = require("express");
const sio = require("socket.io");
const cors = require("cors");
const app = express();
const server = http.createServer(app);
let io;

app.use(express.static("public"));
app.use(cors());
const SERVER_PORT = process.env.SERVER_PORT;

io = sio(server);

app.get("/", (req, res) => {
  res.sendFile(__dirname + "/public/index.html");
});

server.listen(SERVER_PORT, () => {
  console.log(`Server is up and running at: http://localhost:${SERVER_PORT}`);
});

let board;
const Five = require("johnny-five");
const BOARD_PORT = process.env.BOARD_PORT;

board = new Five.Board({
  port: BOARD_PORT,
});

function onReady() {
  let lightLevel = 0;
  const sensor = new Five.Sensor({
    pin: "A0",
    freq: 500,
  });

  sensor.on("change", () => {
    const scaledValue = sensor.scaleTo(0, 100);

    lightLevel = scaledValue;
    console.log("lightLevel:", lightLevel);
    io.sockets.emit("lightLevelChanged", {
      lightLevel,
    });
  });

  io.on("connection", function (socket) {
    console.log(`Client connected: ${socket.id}`);

    socket.on("disconnect", function (reason, socket) {
      console.log(`Client disconnected  with reason: ${reason}`);
    });
  });
}

board.on("ready", onReady);